How to create a form in Slack
Set up your workflow
While you’ll first be presented with picking a name for your workflow, the more important decision you’ll need to make is how your workflow will start.
Choose a trigger
The trigger you pick for your workflow determines how it will start. Workflows are channel-specific, and can only be used in the channel you choose.
Workflows in the attachments and shortcuts menu are easily accessible by members of a channel and can be used anytime. Workflows with other triggers that launch automatically are more contextual; you may want to consider the context of the action that launched them, and keep in mind that people may not be expecting them.
Attachments and shortcuts menu
- Your workflow starts when someone selects it from the attachments and shortcuts menu.
New channel member
- Your workflow starts automatically when someone joins the channel.
Emoji reaction
- Your workflow starts automatically when someone in the channel adds a certain to a message.
Scheduled date & time
- Your workflow starts automatically at a set date and time.
Webhook
- Your workflow starts automatically when a custom webhook sends a web request to Slack from another app or service.
Customize your workflow
Once you’ve chosen a trigger, you’ll pick the channel where the workflow will be available and be prompted to further customize your workflow. What you need to do will depend on the trigger you chose.
Put what you've learned into practice
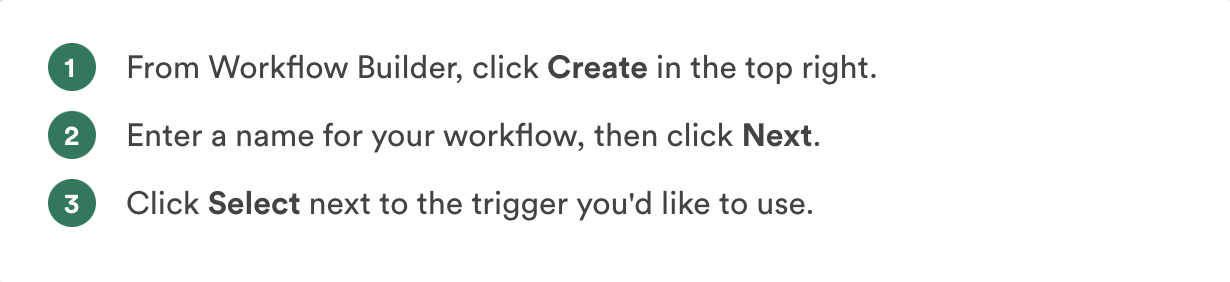
Follow the steps below to open Workflow Builder and set up your workflow.
Step 1: Open Workflow Builder

Step 2: Choose your workflow name and trigger
Step 3: Finish workflow setup
Follow the steps for the trigger you selected to choose a channel for your workflow and finish setup.
Shortcut
- Select a channel from the drop-down menu.
- Add a short name for your workflow that will be visible in the attachments and shortcuts menu.
- Click Next.
New Channel Member
- Select a channel for your workflow from the drop-down menu.
- Click Next.
Emoji
- Select a channel for your workflow from the drop-down menu.
- Click Add Reaction.
- Search for and select any emojis you’d like to trigger your workflow.
- Click Next.
Date & Time
- Select a date from the drop-down menu, then pick the time you’d like your workflow to start.
- Open the Frequency drop-down menu to choose how often your workflow will run.
- Click Next.
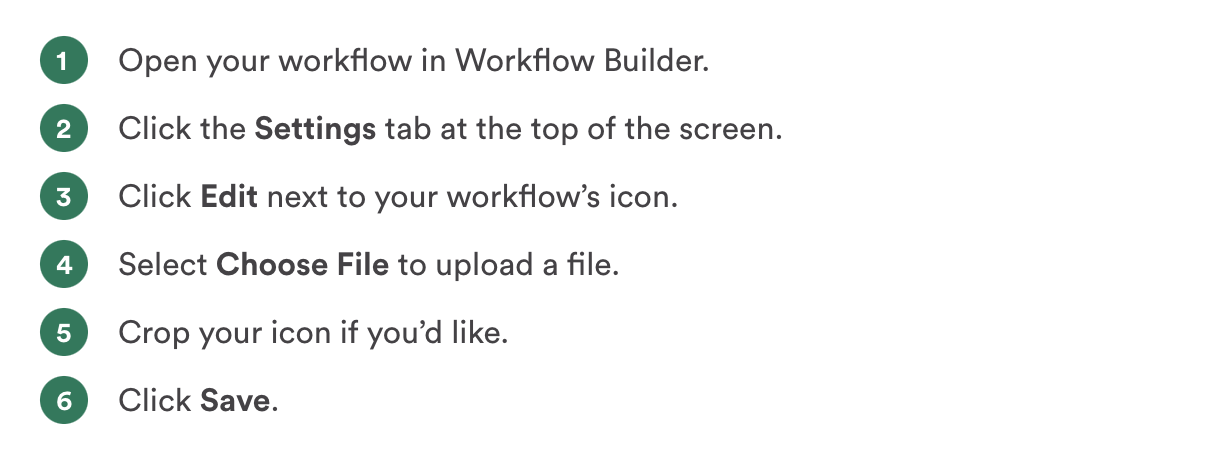
Add a custom workflow icon